

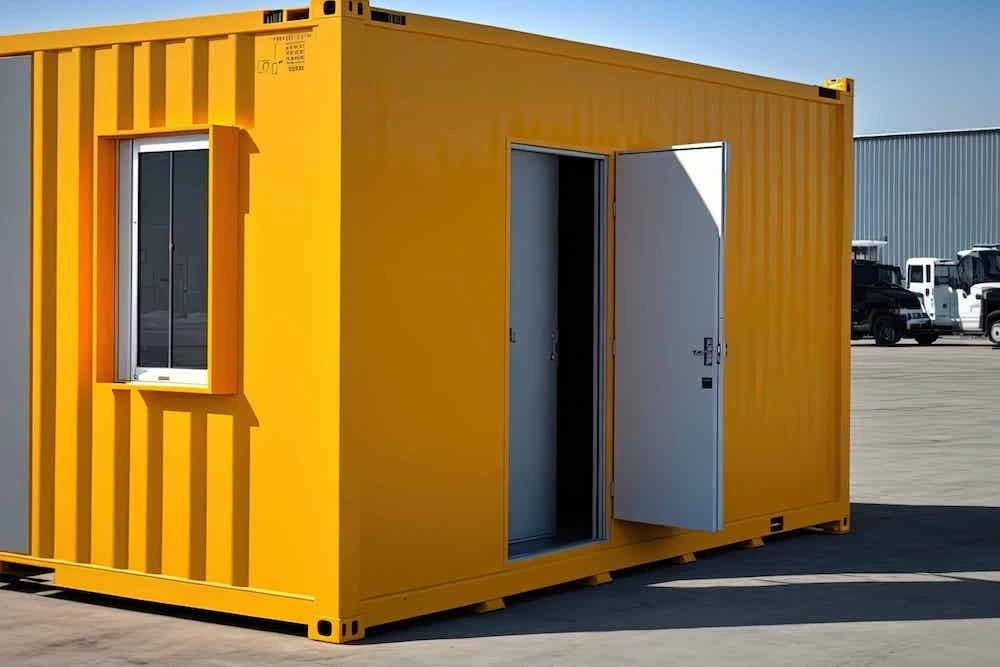
Garage workshops built the old-fashioned way require thousands of dollars, many months of your time, and they’re built in one place permanently. With a shipping container, you get something ready to customize as soon as it’s delivered. It’s made of steel so it’s secure, built to last in the Texas elements with little maintenance, and it can be relocated if you move. Take your shop with you, already fully equipped. No starting over. No abandoned investment.
Workshop Container Quick Specs
| Feature | 20’ Standard Container | 40’ High Cube Container |
| Interior Space | ~150 sq. ft. | ~300 sq. ft. |
| Best For | Small lots / Hobbyist shop | Professional / Large machinery |
| Ceiling Height | 7′ 10″ | 8′ 10″ (Great for dust ducting!) |
| Portability | High (Easy to move) | Permanent / Semi-permanent |
8 Shipping Container Workshop Ideas
The Serious Woodworker’s Shop
If you like to mess around in wood every once in a while, fine. But if you’re serious about woodworking, you’ll need to be serious about dust collection. With 40 ft, you have enough length to run an 8-foot workbench along one wall with a centralized dust collection system occupying the other side of the shop.
Dust Collector Nerd Details:
- Mount cyclone separators as close to the entrance as possible for easy chip disposal
- Run PVC ducting overhead to blast gates at your machines
- Weld brackets to your steel walls at planers, jointers, table saws, etc. to keep filters off the floor
- Fold-down assembly tables that provide you 16′ of edge-gluing capability and flip up for machining
The Junk Shop Mechanic’s Shop
You’ll be lifting cars or operating engine hoists, so your floors need to be reinforced before your shipping container even arrives. Prepare to pour a 4-inch reinforced concrete pad (steel rebar mesh inside) underneath it.
Hoist Those Vehicles Nerd Details:
- Paint your plywood floor with industrial epoxy coating rated for vehicle repair shop use (gas, coolant—that dropped wrench will bounce right off)
- The width of a 40 ft is enough to park two cars bumper to bumper and have room on the sides for rolling tool chests or a parts washer
- Cut one of the existing end doors off (leave the other full door intact for secure storage) and you can drive your vehicles right through it!
- Run 240V circuits for welders and air compressors (there’s nothing better to ground than steel)
Maker/Welder’s Garage
Great lighting is everything. Consider framing windows to cut openings in the roof and place Velux sunroof-style skylights along the center of your roof. They’re specifically designed for metal roofs and provide natural light with minimal UV penetration. Bonus: Unlike windows, they won’t leak rainwater all over your tools either.
Light ‘Em Up Nerd Details:
- Weld in standard residential windows with appropriate insulation framing
- Hang mini-split AC/heaters on outside walls (installing can be DIY for <$1,500)
- Steel holds temperature better than you think once insulated; you won’t roast in the Texas summer
- Electricity should be manageable even in peak summertime use
Tech “Maker Space”
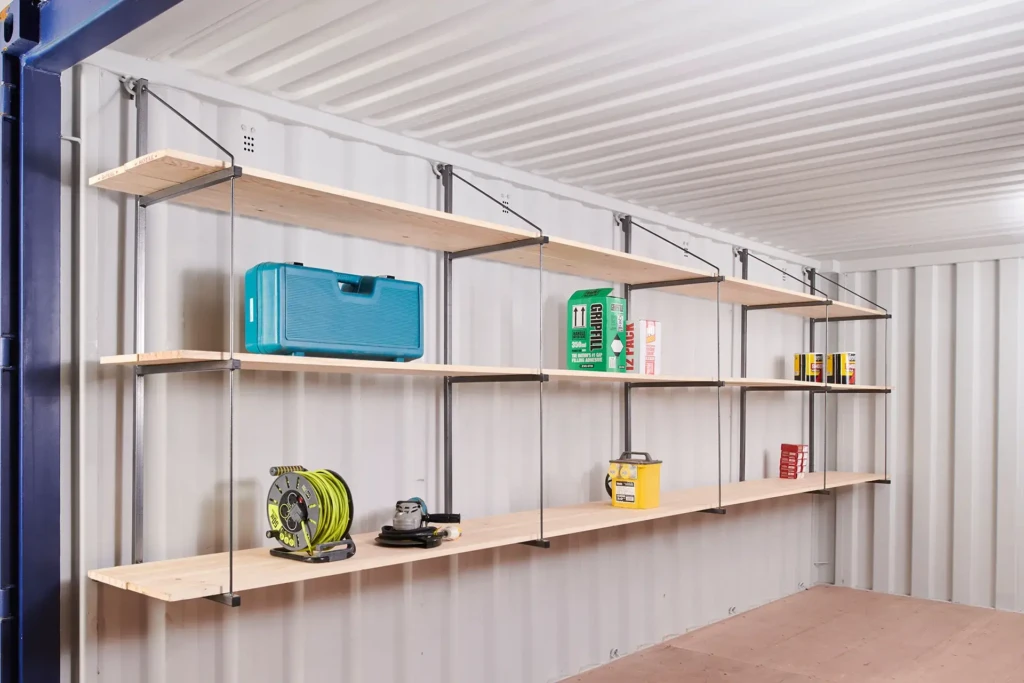
Your 3D printers, laser cutters, and CNC routers require massive amounts of power and filtration. Lucky for you, steel containers make this easy.
Digital Woodworking Nerd Details:
- Mount a 100-amp subpanel with dedicated circuits for each major device
- Steel enclosures provide grounding and actually reduce EMI/RFI—your electronics will run better than in a basement DIY shop
- Mount inline duct fans that vent to the roof, creating negative air pressure and pulling dirty air from your workspace
- Add rubber mats over the plywood floor to dampen vibration from CNC routers
- If you’re getting crazy, go full spray booth with positive-pressure HEPA filtration to keep your work environment dust-free
Potting Shed/Gardening Workshop

Potting Shed/Gardening Workshop
Gardening Workshop Nerd Details:
- Leave plywood flooring as-is or paint with truck bed liner coating
- Hang garden tools off the ceiling or place heavier items on commercial shelving
- Gas cans, seed, and soil nutrient storage won’t have to worry about mildew or moisture
- Roll it up on wheels, break down the workbench/sink, and store away tools overnight at job sites
Central Texas Lifestyle Workshops
Texas Barbecue & Smoker Prep Room
Turn a 20-ft container into a temperature-controlled barbecue prep room. Keep your offset smoker ingredients, rubs, marinades, and butcher-block countertops tucked inside your very own climate-controlled steel box. Add an exhaust hood mounted on the wall, along with a small handwash sink to stay sanitary while you cook. In the Austin BBQ scene, prep space is king. Level up your backyard game.
Micro-Brewery or Garage Winery
Wineries and craft breweries are popping up everywhere in Central Texas. Renting a 40- ft high cube gives you plenty of headspace for fermenting barrels, kegging stations and grain storage. Line the walls and ceiling with insulation and set up a mini-split to keep cooling temps appropriate for fermentation (60–68°F for ales, generally). The moisture-resistant walls and sealed floor will save you time sanitizing.
Drought-Resistant Gardening Shop
Water restrictions and limestone soils make xeriscaping with native plants a lifestyle in Austin. Stock a 20-ft container with potting benches, assembly stations for drip irrigation setups, shelving for seed-starting under LED grow lights, and overhead storage for bags of compost and decomposed granite. Add a small sink with gray-water capture capability.
Conversions Every Workshop Needs
Insulation: The First Frontier
You haven’t lived until you’ve worked in an uninsulated container on a Central Texas summer day. Regular temperatures exceed 100°f in the Austin metro during June-September. Closed-cell spray foam insulation (2–3 inches) isn’t a luxury; it’s necessary for survival. Spray foam provides an air seal, adds rigidity to your walls, and prevents moisture absorption.
Insulation Showdown:
- $2–3/sq. ft. for spray foam, but better R-value and no moisture absorption
- Kills the metal sound from batt types of insulation
- $1–2/sq. ft. for batt insulation, but you have to frame out walls and add vapor barrier
- 3″ of foam in your roof will keep you 15-20 degrees cooler inside on 100°+ days
Spray foam insulation topped with ceramic roof coating or white roof paint reflects solar heat away. Combined with a high-efficiency mini-split AC system, humidity & energy bills disappear in Central Texas’ brutal summers.
Lighting & Electrical: Bright Ideas
LED shop lights have changed the game on containers. Linkable 4-foot fixtures strung down the center of your ceiling provide even light for less than $200.
General Shop Circuits:
- Shop light circuit (15 amp)
- Standard receptacle circuit (20 amp)
- 240V circuit for table saws/planers (depending on tool electrical requirements, go 30–50 amp)
- HVAC circuit if necessary (15–20 amp)
- Run conduit along the bottom walls for future wire pulling
- GFCI will be required on all receptacles because your metal shop is now the ground path—electricity loves steel boxes
Ventilation: In and Outflow
Even if you have HVAC, you still need passive ventilation. Metal buildings are going to create large temperature differentials with the outside air. With those large temperature differentials, you’re going to have condensation. That condensation has to go somewhere; otherwise you’ll rust out your building.
Good Airflow Habits:
- Put louvered vents into floor on one side of shop and near ceiling on opposite end.
- Mount exhaust fan in ceiling big enough to turnover air every 5-10 minutes.
- Have welders running/paint/solvents? You’ll need a spray booth with external venting and negative air pressure
- If you don’t ventilate properly, you’ll start growing rust and mold from the temperature fluctuations
Flooring: Where You’ll Spend Most of Your Time
Yes, the factory-applied marine plywood is okay if you don’t intend to work inside of it. But we gearheads like something better. An epoxy floor coating (like epoxy paint only thicker) will give you a durable surface that stands up to wear and is easy to clean.
Flooring Showdown:
- Sand plywood down so glue can stick to it
- Rubber flooring tiles lock together. They are squishy and don’t need adhesive
- Float the entire floor with a thin layer of concrete (make sure by asking an engineer, that the container can support the additional weight)
Fit Your Tools to the Space
Maximize Vertical Space: Magnets Are Your Friend
Hang those magnetic screw trays wherever you want, parts bins too. Magnetic tool strips have endless possibilities and just stick to those steel walls.
Working Vertically Nerd Details:
- Cover a whole wall with magnetic sheet if you want a movable pegboard—sockets to spray paint cans
- Weld storage racks to your ceiling for off-season or special-occasion items
- Your roof’s got corrugations every few inches. Utilize that high-up space for lumber racks, hang bikes, or mount overhead cabinets
- Install wall cabinets no more than 16 inches deep. Keeps your benches clear and lets you see everything
Fold-Down Work Surfaces
I don’t want a workbench taking up floor space when I need it open. You can build fold-down tables to the dimensions you want. Attach to your wall with piano hinges, fold-down brackets, or drop-down legs.
Fold-Out Workbench Nerd Details:
- Build a full 6-foot bench that folds down to roughly 3 inches of depth
- Include built-in clamping stations and dog holes
- Flip it up and you have vertical storage on a French cleat wall
- Flip it down and you have an 8-foot-wide glue-up station
The Perks of Going “Dual Container”
Take two 20ft and place them parallel to each other and bridge them with a large center opening. You just created a 320 square foot workshop with 160 square feet you can customize however you’d like. Keep it open or close it off with drywall and windows. Maybe even a door for staff.
Bonus Build-Off:
- Don’t feel like stopping there. Get crazy and build a two story garage. Place one container over the other.
Bonus Build-Off:
- Don’t feel like stopping there? Get creative and build a two-story garage. Place one container over the other.
Central Texas Site Prep & Delivery
Soil Types & Foundation Advice
Central Texas geography shifts dramatically from east to west just across the I-35 divide:
- East of I-35 (Blackland Prairie): Expansive black clay will expand and lift with any moisture variation. Plan on a thick gravel pad (6–8″ of compacted road base) or a reinforced concrete slab with rebar to prevent settling/cracking.
- West of I-35 (Hill Country): Solid Rock can make traditional slab pours exponentially more expensive than planned. Consider pier foundations or helical screw piles to bypass drilling/excavation through layers of rock.
Don’t pour anything until you have a soil test! Geotech reports run $500–$1,500 in the Austin market, but can save you many times that in foundation fixes.
Delivery Challenges in Central Texas
Delivering a 20- ft or 40-ft container to your Hill Country home or building site poses some challenges you might not find in the city:
- Branches: Those beautiful spreading branches of mature live oak trees lining your ranch road or driveway may need trimming to make way for the 9’6” height of a container sitting on a tilt-bed trailer. Hire an arborist.
- Ranch gates: Many ranch gates are only 12 ft wide. It takes a minimum of 14 ft of clearance to position a 40-ft container sitting on a trailer for proper turning radius. Measure your driveway.
- Steep driveways: Many Hill Country driveways are steeper than 10% grade, too steep for a truck to easily drop off your container. Double check with your driver or request a site visit before booking.
Permitting, ETJ, and HOAs in the Austin Metro
Local codes will be different for every property based on what jurisdiction you are in:
City of Austin:
- Accessory structures like shipping containers most likely will need a building permit. Verify current setback rules (typically 5–15 ft from property lines, varies by zoning).
- Be mindful of impervious cover limitations: Your concrete pad will count against your total allowed impervious cover on your property. Limit can be as low as 40–45% in some Austin watersheds.
Extraterritorial Jurisdiction (ETJ) & Unincorporated Counties:
- Places located in the ETJ or in Unincorporated Hays, Williamson, or Bastrop Counties typically have fewer restrictions. Many only need a septic/ well permit if they have one – not a building permit for an accessory dwelling.
- However, always double-check with your county’s development services department before you think you have no restrictions.
Suburban HOAs (Round Rock, Pflugerville, Leander, Lakeway, etc.):
- HOAs in master-planned communities will typically have CC&Rs that limit or ban visible shipping containers. Custom exterior cladding (wood, metal panel, stucco) or specific paint colors may be required.
- HOAs may allow containers if they will be screened from view by fencing or landscaping. Always submit your plans for approval to the architectural review committee before buying.
Pricing Estimates for Common Modifications
| Modification | 20-ft Container | 40-ft Container |
| Closed-Cell Spray Foam (2–3″) | $1,500–$3,000 | $3,000–$5,500 |
| 100-Amp Electrical Subpanel + Wiring | $2,500–$4,500 | $3,500–$6,000 |
| Epoxy Floor Coating | $500–$1,200 | $1,000–$2,200 |
| Mini-Split HVAC (Install + Unit) | $1,500–$3,000 | $2,500–$4,500 |
| Residential Window Cut-In (per window) | $400–$800 | $400–$800 |
| Reinforced Concrete Pad | $2,000–$4,000 | $3,500–$7,000 |
| Container Delivery (within Texas) | $500–$2,500 | $800–$3,500 |
| Custom Exterior Cladding | $3,000–$6,000 | $5,000–$10,000 |
Note: Prices shown are estimates 2024–2025 for the Texas region. Prices vary by contractor, job site conditions, and material availability.
Why Buying Quality Matters
Buying previously used shipping containers for your workshop conversion has invisible costs. A One-Trip container (AKA new, AKA premier condition) has only traveled across the ocean one time. They offer the benefits of strong steel with little to no cosmetic damage.
One-Trip versus Used Conditions:
- No soft floor spots or mystery stains from whatever was stored previously in the container.
- Repairing damage only costs more money versus starting with a container that has none
- You’re going to cut holes and weld things to your container. Start with the bad stuff and it will only create headaches
- Look for Cargo-Worthy or IICL (Improved Intermediate Certificate of Loading) certified containers. Both show the container was deemed structurally sound by a third-party inspector.
- Wind-and-Water-Tight (AKA Rain-Tight) certified containers ensure water tests passed before you buy.
Stop Dreaming, Start Building: Your Custom Texas Workshop Awaits
Build out your dream shop on your timeline and budget. Shipping container workshops are professional enough for hobbyists and serious enough for pros. The only limitation is your imagination. Need Assistance? We currently have 20-ft and 40-ft containers in stock. Otherwise, call Steel Box Shipping Containers for a no-hassle quote. We will assist you in choosing the right container and deliver it anywhere in Texas.
Container Workshop FAQ
How much does a shipping container workshop cost?
$8,000–$15,000: DIY build – Simple 20-ft insulated/floored/installed conversion. $25,000+: Professional Shops – Larger fully built-out 40-ft workshops built by a professional contractor. These can range from +$25,000 and include a concrete foundation, custom wiring, plumbing, insulation, fixtures, and exterior skin. Obviously, the pricing can vary greatly depending on your desired quality level and local prices for contractors.
Do I need a permit to put a shipping container on my property in Austin?
Yes, if inside the Austin city limits. Shipping containers used as accessory structures will generally need a building permit while also needing to satisfy setback and impervious cover requirements. Permit requirements are typically very limited if located in the ETJ or an unincorporated area of Hays, Williamson, or Bastrop County. Check with your county’s development services department before placing a container on your property.
What size container do I need for a workshop?
20-ft (~150 sq. ft.) is great for hobbyist shops, potting sheds, and other single-discipline workspaces. 40-ft high cube (~300 sq. ft. with 8’10” ceiling height) is recommended for professional shops, mechanic bays, or shops with large machinery and dust collection systems.
How do I keep a container workshop cool in Texas?
Insulate walls and ceilings with 2–3 inches of closed-cell spray foam. Apply a ceramic roof coating or light-colored roof paint to reflect sunlight. Install a high-efficiency mini-split AC unit that’s properly sized to cool the square footage of your container. With proper insulation and an AC unit, you can keep interior temperatures comfortable even when it’s 100°+ outside in Central Texas.
How much clearance do I need for container delivery?
Make sure you have at least 14 ft of clearance width at gates and entryways (to accommodate trailer turning radius) and about 14 ft of overhead clearance to account for the container on a tilt-bed truck. Additionally, you should have at least 60 ft of approach length that is straight for delivery drivers to back the truck and position container for offloading when working with 40-ft lengths. For step-by-step preparation, review our guide on how to move a shipping container.
Can my HOA prevent me from using a shipping container as a workshop?
HOAs around Austin-San Antonio (Round Rock, Pflugerville, Leander) often have CC&Rs which restrict or outright ban visible shipping containers on residential property. Some HOAs have approved containers with custom exterior cladding, matching container paint, or obscuring the container behind fencing and landscaping. Be sure to submit your plans to your HOA’s architectural review committee prior to purchasing a container.