If you’ve ever opened a shipping container at around 3 p. m. on a July afternoon in Central Texas, you know exactly what we’re talking about. It feels like opening the door to a giant oven. When outdoor temperatures reach over 100° F, which they routinely do for month upon month in Austin, Waco, and San Antonio climates, an uninsulated steel box will reach temperatures far exceeding that internally.
That’s bad news if you’ve got anything inside of it. Not only is steel an excellent heat conductor (making them ideal for zipping across seas but problematic for storage in the Texas sunshine), it also presents major issues for storing anything remotely sensitive to heat. Need a storage container for a job site in Austin? Looking to repurpose a container into a hobby shop in Round Rock? Creating temperature-sensitive materials? In Texas, temperature control isn’t just a luxury, it’s a necessity. In most cases, it’s the difference between a helpful storage solution and a metal sauna.
Below, we break down the best methods for cooling a shipping container, from easy DIY solutions to heavy-duty modifications we can build into your shipping container before it’s delivered to you.
At-A-Glance: Shipping Container Cooling Strategies
| Cooling Strategy | Best For… | Effort Level | Who Handles It? |
Shade, Layout, & Light Paint | Basic seasonal storage | Low | DIY (You) |
Louvered Vents & Windows | High-traffic storage / basic workspaces | Medium | Our Modification Team |
Extractor Fans | High-heat zones (Waco/San Antonio) | Medium | Our Modification Team |
Spray Foam + AC / PTAC Units | Backyard offices, workshops, living spaces | High | Our Modification Team |
Phase 1: Easy DIY Adjustments
Start here if you’re renting or already leasing a standard container onsite. They’re cheap (or even free) and can alleviate some of the worst of the heat.
- Use Existing Shade & Position Thoughtfully: Take advantage of any shade you have, whether it’s a stand of live oaks, the north face of a building, or an existing structure. Believe it or not, where you place your container has a big impact.
- Position Long-side North-South: Positioning the container long-side north-south instead of sitting broadside in the afternoon sun helps as well.
- Create Airflow: Adding a shade sail or awning that creates a gap between sun and the steel roof works wonders. That space does surprisingly much to keep heat buildup down.
- Stack Smart: When configuring more than one container, try to position them so that they shade each other during the hottest parts of the day instead of trapping every unit in full sun. Likewise, don’t stuff containers too close together. Leaving space between stacked containers or containers that sit side-by-side allows airflow instead of trapping heat inside dead air space.
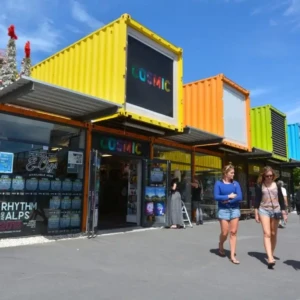
- Pick A Light Color Off the Bat: This is easy to forget, but important because a container that is white or light colored outdoors reflects solar heat, where a dark container absorbs it. If you’re buying or renting and can choose your color, go with light. It can make a surprisingly big difference because your container will stay cooler by reflecting sunlight instead of absorbing it. It’s also the least expensive upgrade you can make, and you decide before the unit even arrives!
Phase 2: Structural Ventilation & Upgrades
DIY modifications help, but eventually you’re going to want dedicated airflow incorporated into the container itself. That’s our specialty. Creating adequate ventilation requires cutting holes into steel, and air flow doesn’t work if you just place those holes randomly.
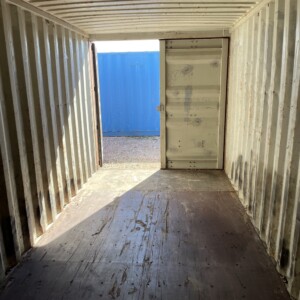
Correctly Placed Vents & Windows
Hot air rises and accumulates at the top of an enclosed space. Ventilation gives it somewhere else to go. Strategically placed vents and windows encourage steady airflow without using any power. Place intakes low and exhaust vents high to create natural convection, pulling cool air in and pushing hot air out.
We can custom install heavy duty louvered vents/windows prior to delivery so you know ventilation will function as intended.
Place your vents incorrectly, and you are just slicing holes into an otherwise useful container. Routing your own vents will weaken the structural integrity of your container if not done correctly, and may leave your container exposed to the elements if not weatherproofed correctly.
Installed Extractor Fans
If passive ventilation isn’t cutting it for you and let’s be serious, in places like Waco or San Antonio, Texas it probably isn’t you can install a powered extractor fan. These battery or solar-powered fans force hot air out of the container. They require a little juice, but think of them as air conditioning for your container. You want one if you’re storing your container in extremely hot conditions or if summer is your peak season. Fans work best when combined with good vent/window placement.
Phase 3: The Ultimate Heat Shield — Insulation & AC
Seeking comfortable climate controlled indoor space? An office? A workshop you want to spend hours in? Storage for anything you don’t want exposed to temperature fluctuations? If so, this is where the magic happens. Highest value modifications. Also, none of these should be DIY projects.
Professional Closed Cell Spray Foam Insulation
Sure, people install their own insulation in batts or panels all the time. But lots of people end up unhappy with that decision.
Because of condensation. Houston’s humid air and your steel shell are just begging for condensation to happen. And when it does, your regular insulation will retain that moisture against your steel skin, causing mold, rust, peeling paint, and nastiness behind your walls in just a couple seasons.
Spray foam doesn’t do that. It adheres to your steel perfectly, sealing against any moisture and creating a thermal barrier that covers every inch of your interior surface. No gaps. No seams. Nothing to peel away or fall off.
It’s the biggest single upgrade you can do for your containers’ temperature retaining abilities.
AC and PTAC Units, Properly Installed
Insulation will keep the heat out, but an air conditioner actually removes the heat from inside your container. The tricky part is installation. Installing AC or PTAC units requires cutting holes into your steel and framing them so the unit sits flush, with no gaps.
If done improperly, you now have a welcome pathway for water to enter every time it rains. We’ve got experts who will frame and install your commercial-grade AC unit so that when your container arrives on site, you can plug it in, turn it on, and enjoy cooled interiors with zero leaks.
Don’t Sweat It. We’ll Do The Heavy Lifting
You can beat the Texas heat on your own, or you can let us do the heavy lifting. Why battle your way through a DIY modification, cutting steel, chasing leaks, crossing your fingers on insulation when you can have a fully-functional, climate-controlled container delivered to your door, built tough enough to take on a Central Texas summer from DAY ONE?
From a few vents and a light coat of paint, to fully insulated and air-conditioned, we’ll engineer the right solution based on how YOU need to use your shipping container. Let’s stay cool this summer.